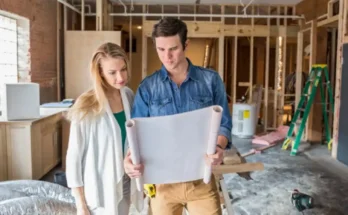

Laminate flooring is a popular choice among homeowners for its durability, affordability, and ease of installation. Whether you’re a seasoned DIY enthusiast or a novice looking to take on a new project, this comprehensive guide will walk you through the process of installing laminate flooring in your home. Follow these steps to achieve a beautiful and long-lasting floor that will enhance the aesthetics of any room.
Introduction
Laminate flooring is an excellent option for those who want the look of hardwood or stone without the high cost and maintenance. It’s a versatile, DIY-friendly choice that can transform the appearance of any room in your home. In this guide, we’ll take you through the process step by step, from gathering the necessary tools to the finishing touches. Whether you’re a seasoned DIY enthusiast or a novice looking to take on a new project, this comprehensive guide will walk you through the process of installing laminate flooring in your home. Follow these steps to achieve a beautiful and long-lasting floor that will enhance the aesthetics of any room.
Gathering Your Tools and Materials
Before you begin, make sure you have all the tools and materials you’ll need:
- Laminate flooring planks
- Underlayment
- Tape measure
- Circular saw or handsaw
- Spacers
- Hammer and tapping block
- Utility knife
- Chalk line
- Safety goggles
- Knee pads
Choosing the Right Laminate Flooring
Selecting the right laminate flooring is crucial. Consider factors such as style, color, and thickness. High-quality laminate can closely mimic the look of real wood or stone.
Preparing the Subfloor
A smooth and clean subfloor is essential for a successful laminate flooring installation. Remove any existing flooring and ensure the subfloor is level and free of debris.
Underlayment Installation
Underlayment provides cushioning and noise reduction. Install it over the subfloor, ensuring it’s well-secured and free of wrinkles.
Acclimating the Laminate Planks
Allow your laminate planks to acclimate to the room’s temperature and humidity for at least 48 hours before installation.
Starting the Installation
Begin at the longest wall and leave a 1/4-inch gap between the planks and the wall for expansion.
Interlocking the Laminate Planks
As you progress, interlock the planks by angling and snapping them together. Use spacers to maintain an even gap along the edges.
Cutting Laminate Flooring
Measure and cut planks as needed to fit the last row, ensuring they’re staggered for a natural look.
Working Around Obstacles
For door frames and other obstacles, use a jigsaw to make precise cuts to fit the laminate around them.
Transition Strips and Molding
Install transition strips at doorways and use molding to cover expansion gaps around the room’s perimeter.
Finishing Touches
Secure the last row of planks using a tapping block and ensure all seams are tightly closed.
Cleaning and Maintenance
Laminate flooring is easy to maintain. Regularly sweep or vacuum, and clean up spills promptly. Avoid excessive moisture.
Benefits of Laminate Flooring
- Durable and long-lasting
- Affordable compared to hardwood
- Easy to clean and maintain
- Wide variety of styles and colors
- DIY-friendly installation
Conclusion
Installing laminate flooring can be a rewarding DIY project that transforms your living space. With the right tools, materials, and careful attention to detail, you can achieve a professional-looking result. Enjoy the beauty and durability of your new laminate floor for years to come!
References: